Frame Timing
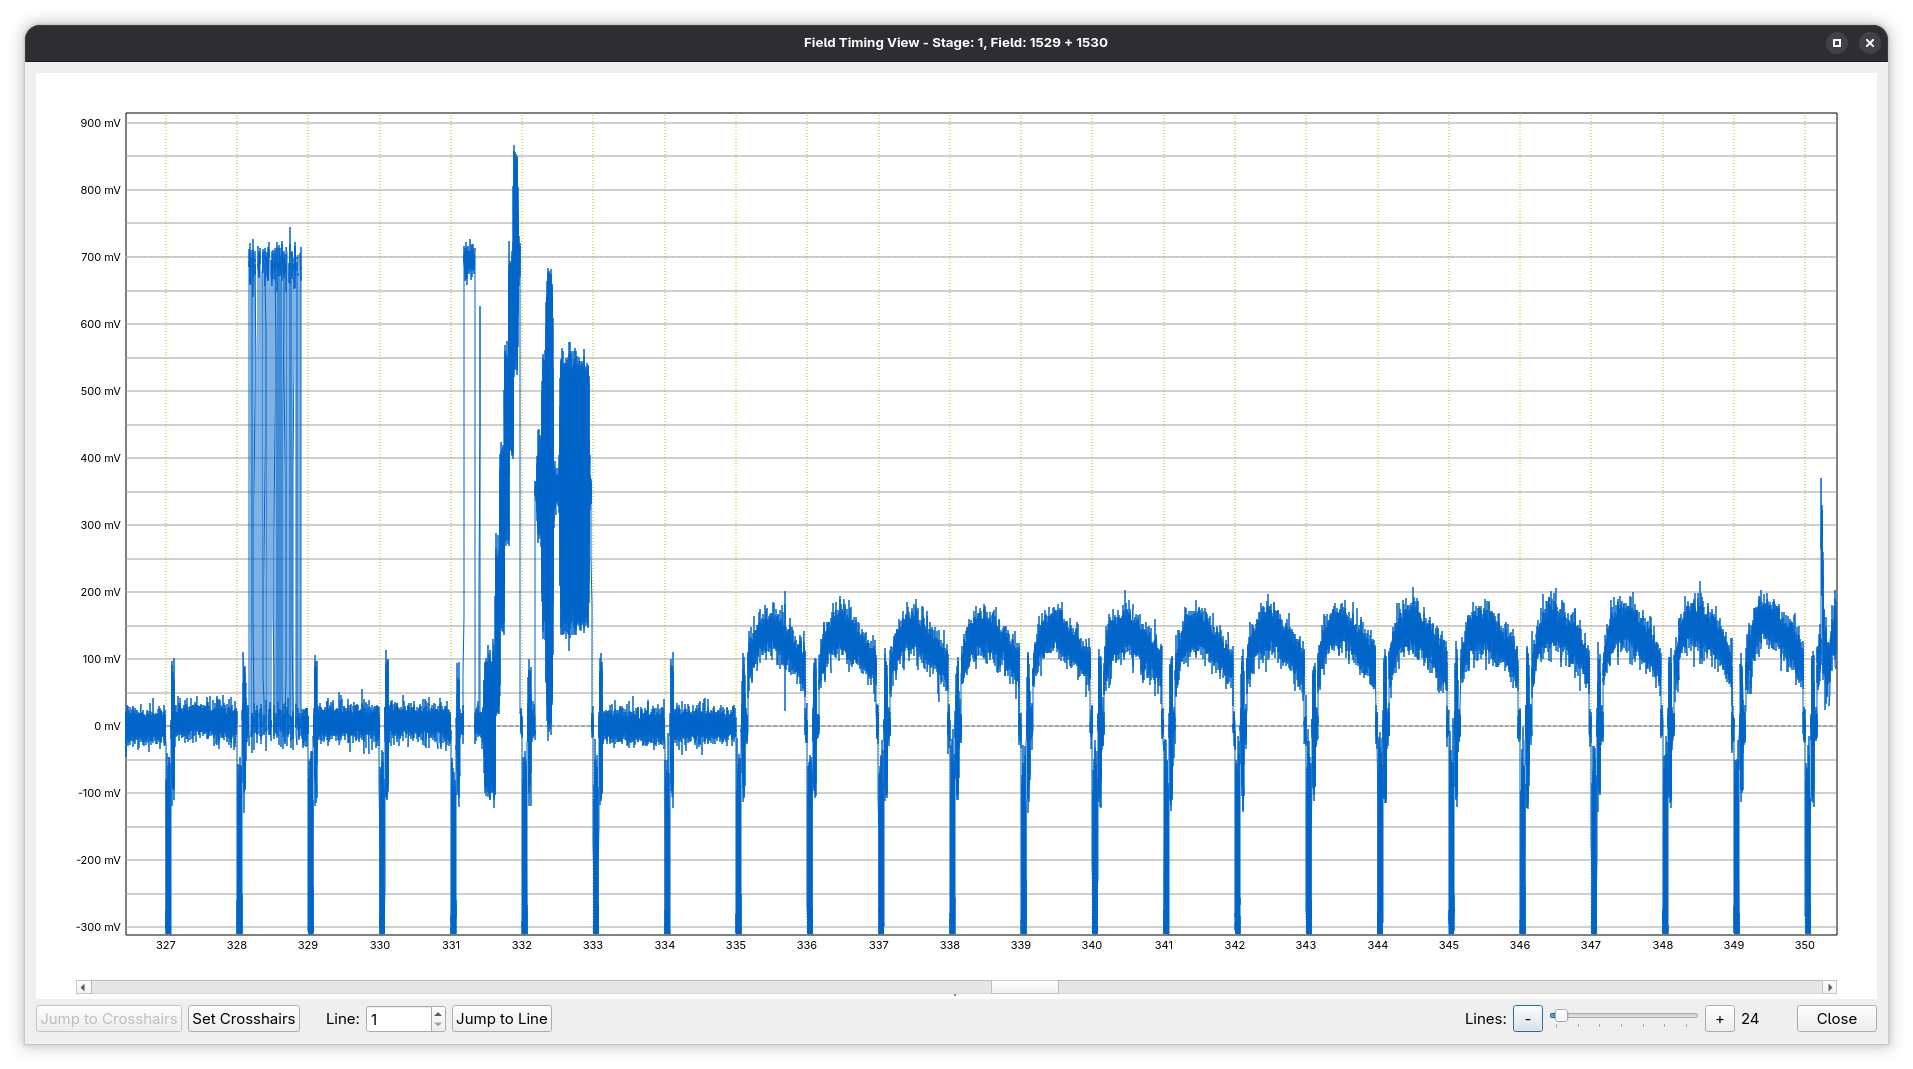
The Frame Timing View draws the signal of the frame on show in the Preview window as one continuous waveform, line after line, so that sync pulses, blanking, VBI lines and the transition into active picture can be followed across the whole frame. Like the Preview window it is not a stage: it is a read-only view of the output of the stage currently being previewed.
Open it from the Preview window with View → Frame Timing (Ctrl+Shift+T). The entry is greyed out, and the status bar says so, when the stage being previewed does not offer the view.
Renamed in v2.0: This dialogue was called the Field Timing View in Decode-Orc 1.x.
What it shows
- The horizontal axis is sample position through the frame. Dotted vertical markers mark the start of each line and are labelled with the line number; at wide zoom only every nth line is marked so that the labels stay readable.
- The vertical axis is signal level, labelled in the project's amplitude unit (IRE, millivolts or 10-bit samples, chosen in File → New Project… or File → Edit Project…).
- When the preview is showing a frame, both fields are drawn, the first field's lines followed by the second field's; when it is showing a single field, only that field is drawn.
- If cross-hairs are set in the Preview window (by clicking on the picture), the sample under them is marked with a green vertical line.
The window title names the stage and the frame (Frame Timing View – Stage: …, Frame: …). The view follows the preview: stepping or playing to another frame redraws it.
Controls
| Control | Description |
|---|---|
| Jump to Crosshairs | Scrolls the view so the cross-hair position is in the centre. Enabled once cross-hairs are set in the Preview window. |
| Set Crosshairs | The reverse: places the Preview window's cross-hairs on the sample at the centre of the timing view, so the Frame Scope and the preview picture point at the same place. |
| Line / Jump to Line | Type a line number (1-based) and press Enter or Jump to Line to scroll that line into the centre of the view. |
| Channel | Y/C sources only: Luma (Y), Chroma (C), Both (Y & C) or Y+C (the two channels summed into a composite signal). Hidden for composite sources. |
| Lines (− / slider / +) | How many lines fit across the view: fewer lines shows more detail. The number beside the slider is the current count. While the slider is being dragged the waveform is drawn in a quick draft form and redrawn in full once it settles. |
| Close | Closes the view. |
The mouse wheel scrolls the view along the frame, and the waveform can be dragged left and right with the left mouse button. The window remembers its size and position between sessions.
Typical uses
- Checking where sync, burst and active picture sit on each line, and whether a stage upstream has shifted them
- Following the VBI lines (biphase code, closed captions, teletext or test signals) across the vertical blanking interval
- Seeing the effect of
mask_line,video_paramsor dropout correction across many lines at once - Finding a line of interest, then using Set Crosshairs to open the same place in the Frame Scope for a sample-level look
For a per-sample view of one line use the Frame Scope; for colour-frame sequence and frame continuity, use the stage tools and observers described in the stage reference and the Observers page.